

In this guide, we will teach you how to setup WooCommerce Category Discount to create coupon discounts, which can help you to retain your customers.
Note: This article explains an advanced setup and requires the basic setup knowledge to follow along. If you have not gone through the basic setup tutorial, then we would recommend you to go through the basic setup first from here.
Who should refer to this article?
- You are planning to provide discounts in your digital store and looking for a great discount plugin.
- You have bought the WooCommerce Category Discount plugin and looking for a guide to set it up.
- You don’t want to loose your customers.
- You want to retain your customers and hence increase sales and profits day by day.
Why should I refer to this article?
As a store owner or moderator, you may increase the one-time sales, and in-turn profits, by providing attractive discounts. But this is one-time and providing discounts does not guarantee that the customer will come back to you for future purchases. Of course, the customer will come back to you for your quality service/product but what if they have another option with the same quality and popularity?
This is where coupon discounts play an important role. In general, any discount plugin in the market provides a discount for the current purchase or order, which may be very attractive. But none of them provides a discount for future purchases. The team at WildProgrammers did found that glitch and hence added the functionality of providing coupon discounts for the next purchase. In this way, you won’t end up giving multiple discounts to your customer and you will also be able to tempt them as well as retain them for future purchases.
If this is something that sparks your interest, read on… This article is dependent on a basic setup article, which can be found here. Hence we would recommend you to go through the basic setup article if you have not gone through as there are a lot of basic instructions there which will not be covered here. Saying this, we are assuming that you have downloaded the plugin, installed it and are now ready to jump straight in this tutorial.
Settings Page
The first and foremost step for this tutorial is to enable Coupon discounts in the plugin settings. By default, the plugin enables the discount during the current purchase. To enable a coupon discount, you need to modify the default settings. For this, login to your WordPress admin dashboard and navigate to WooCommerce -> Settings -> Discount Categories. You will see a screen as below.
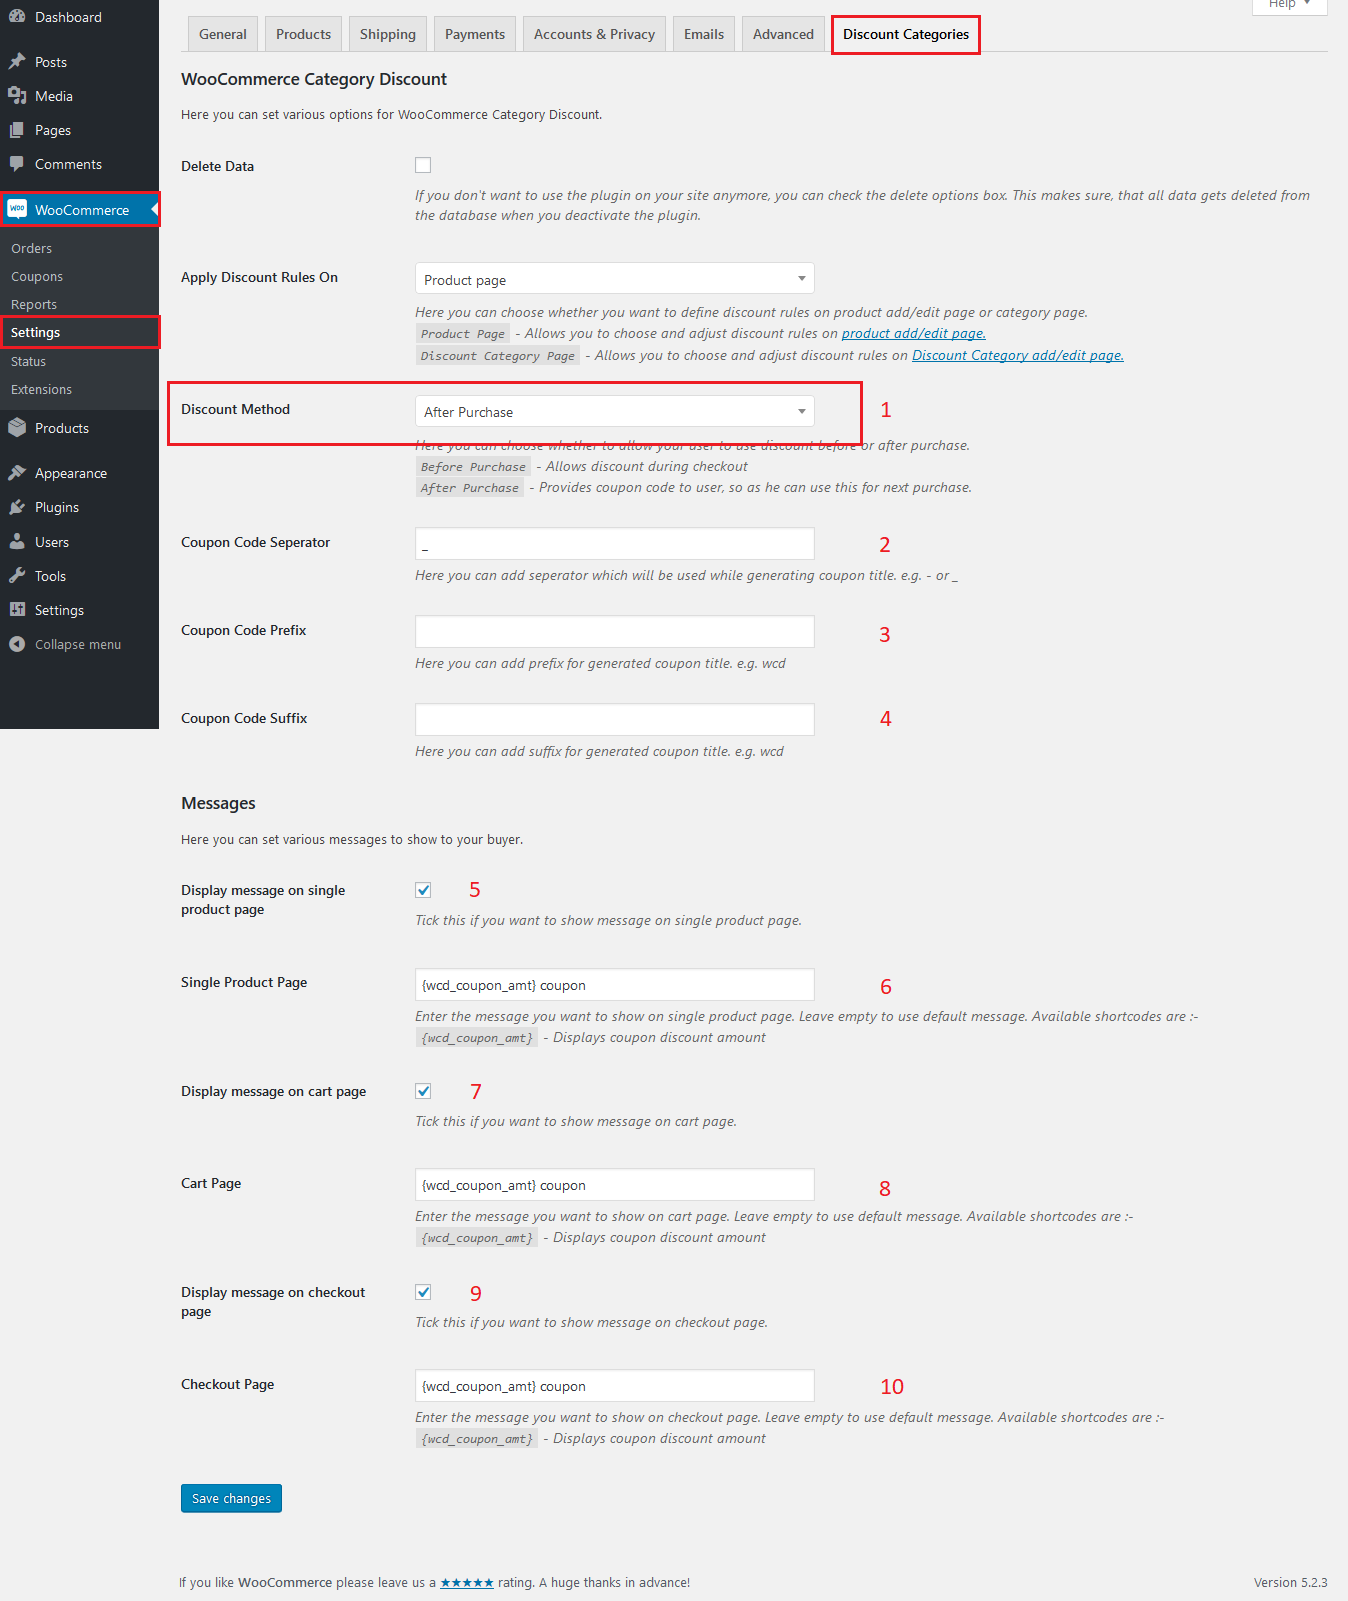
As you can see in the above screenshot, there are plenty of options provided to you for your convenience. Let’s go through each of them below.
- Discount Method – Here you need to select the discount method, which can be either before purchase or after purchase.
- Before Purchase – Discount will be applied during the current purchase.
- After Purchase – No discount will be applied to the current purchase. Instead, a coupon code will get generated and will be given to the user when the order completes. Users can use this coupon code for future purchases.
We need to select after purchase to enable the coupon discounts.
- Coupon Code Separator – Here you can add separator which will be used while generating coupon code. E.g. – or _
- Coupon Code Prefix – Here you can add the prefix for generated coupon code. e.g. coupon-prefix or store-name
- Coupon Code Suffix – Here you can add the suffix for generated coupon code. e.g. coupon-suffix or store-name
The below section allows you to control the discount messages, shown to the user. - Display message on the single product page – Tick this if you want to show message on the single product page.
- Single Product Page – Enter the message you want to show on the single product page. Leave empty to use the default message. Available shortcodes are:-
{wcd_coupon_amt}– Displays coupon discount amount - Display message on cart page – Tick this if you want to show message on the cart page.
- Cart Page – Enter the message you want to show on the cart page. Leave empty to use the default message.
Available shortcodes are:-{wcd_coupon_amt}– Displays coupon discount amount - Display message on the checkout page – Tick this if you want to show message on the checkout page.
- Checkout Page – Enter the message you want to show on the checkout page. Leave empty to use the default message. Available shortcodes are:-
{wcd_coupon_amt}– Displays coupon discount amount
There are all settings for now. Need any additional setting? Feel free to create a ticket on our support platform.
Email Settings | WooCommerce Category Discount
One more step before you can start assigning discounts and provide coupons to your customers is to manage the email settings. You will be wondering why we use WooCommerce emails and not email the users directly? The question does make sense but we are sure that our answer makes much more sense then question 🙂
So, briefly, there are 3 reasons why we extended WooCommerce emails over emailing users directly.
- Native WooCommerce experience
- The plugin is an add-on of WooCommerce and hence we want you to have a native WooCommerce experience over some custom UI experience, as some other plugins do.
- Minimizing code over-head
- Creating a custom UI will add a lot of code overhead, which includes but is not limited to, custom Javascript, CSS files. Not to mention, these files do add extra network calls and hence increase web loading time. You can eliminate all this code-overheads by using native WooCommerce
- Over-riding email templates
- Nobody likes simple & informational email templates. Everyone wants there custom – fancy email templates, which can amaze the customers. As WooCommerce provides template over-riding by default, extending WooCommerce email gives us the same functionality for our extended emails.
Now, it may be clear to you, why we need to extend WooCommerce email templates. So let’s move ahead to have a look at the default email settings. Login to your WordPress dashboard and navigate to WooCommerce -> Settings -> Emails -> Discount Category Coupon, as of below screenshot.
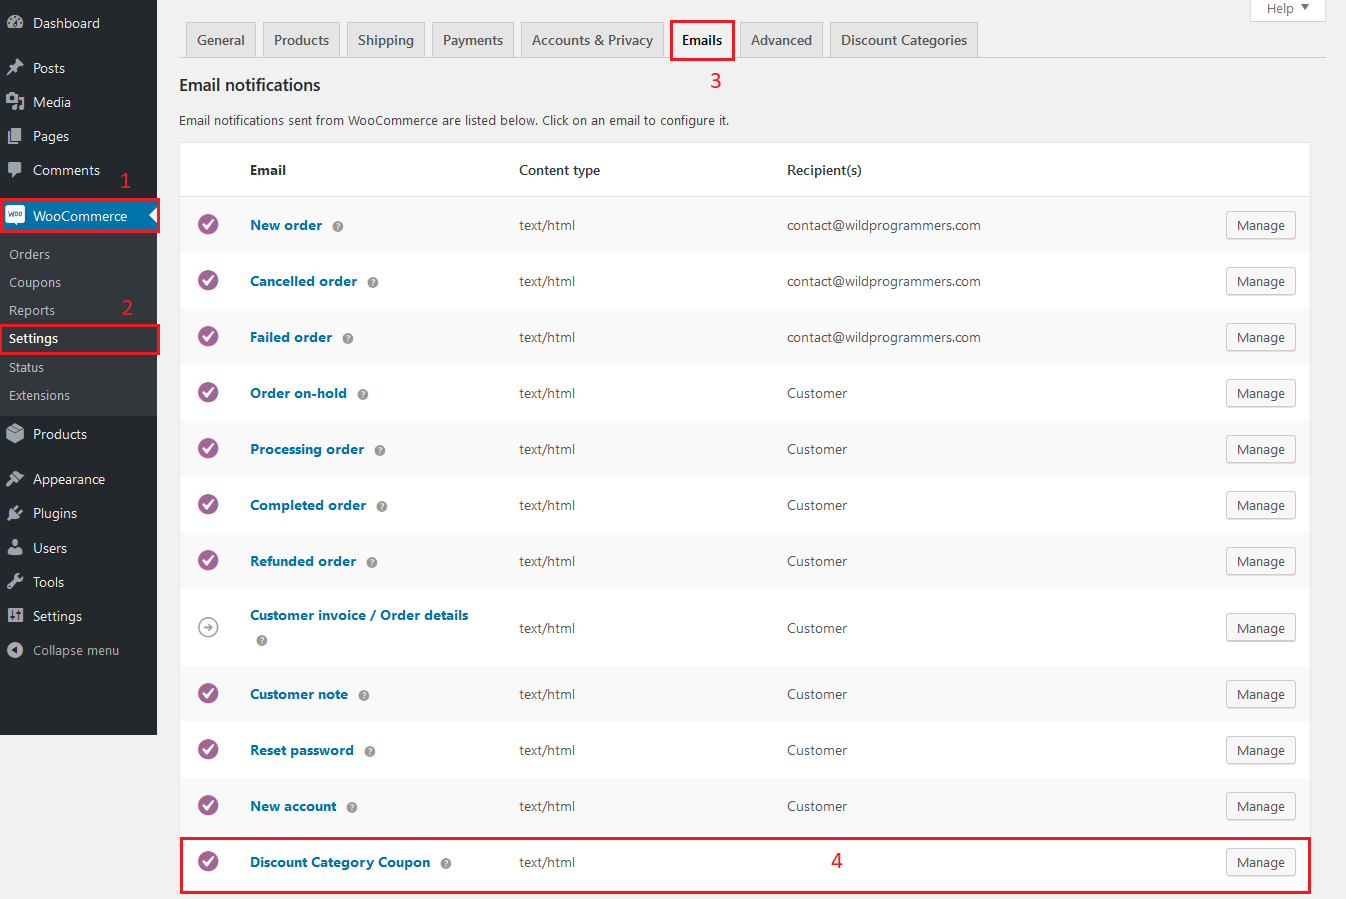
Click on the Manage button and you will be able to see the email settings as of the below screenshot.

Nothing fancy here. This are all the basic email settings. HTML template section at the bottom of the page shows you the instructions to over-ride this template in your theme.
This is all for creating coupon discounts. Now you can go and set up discounts in any WooCommerce product as you normally do and it will start providing the coupons instead of purchase discounts.
What next? Now, we will walk you through the customer experience so as you know what will the customer see when he is eligible for the coupon code.
User Experience
Along with the ease of creating and providing discount rules and coupons, WooCommerce Category Discount also provides a clean user-experience regarding the discount details, on all the pages, so that the user has a clear knowledge of how he is going to get benefited from this purchase.
Note: This tutorial shows the default messages from WooCommerce Category Discount. However, all the messages are editable from the settings page, as described here.
Single Product Page
The plugin provides a message stating the coupon they are going to get by buying the plugin. By default, it displays the discount in the following format: {wcd_coupon_amt} coupon
However, you can modify this to anything you want from the settings page. Refer below screenshot for the sample coupon information on the single product page.

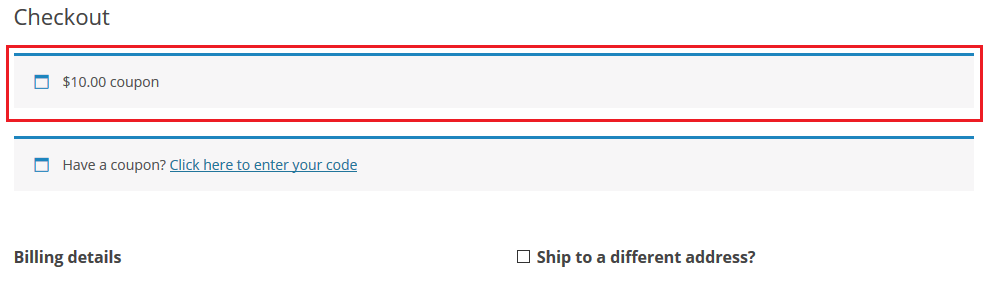
Cart & Checkout Page
Similar to the Single Product page, the plugin provides the coupon information on the cart and checkout page as of below screenshots, respectively.

Coupon Generation
WooCommerce provides 4 type of payment methods, namely BACS, Check payments, COD & Paypal, out of the box. And there are dozens of different payment methods available in the market. Each payment method works differently. Payment methods such as Paypal urges the user to complete the payment on the checkout page. Wheres payment method like BACS provides the feasibility to the user to pay after product trial.
Whatever your payment method may be, in any case, you won’t want your user to get the coupon for incomplete orders. You will want to only provide the coupon once the payment is done, i.e. the order gets completed. WooCommerce Category Discount is smart enough to take care of this. By default, the plugin will generate the coupon only after the order status gets completed. Once the coupon gets generated, it will send a coupon through the WooCommerce email system to the email ID added during checkout. Refer sample screenshot below.

This is all for enabling the plugin for future discounts using the WooCommerce Coupon. Not to mention, we are working on adding many more cool features to the plugin. Trackback to stay updated for the newest plugin features. Until then, happy discounting!!! 🙂