


Welcome to the second article in the series of WordPress Plugins Development. I am excited that you are ready to start with these WordPress plugins tutorial. Throughout this series, we will create a custom lead-generation plugin – which will walk you through building various WordPress features, including custom post type and a shortcode to display a form to the users in front-end. Enough talking, open up any code editor of your choice to follow along and let’s get started.
Topics at a glance
Plugin requirements
At its simplest, WordPress plugin is just a single PHP file with a plugin name under the PHP header comment (However, most of the plugins do require their own directory and bunch of PHP files to achieve the functionality).
To create a simple WordPress plugin, open up your code editor, navigate to your WordPress installation -> wp-content -> plugins and create a directory named as “lead-generator”, with a PHP file named as “lead-generator.php” and update it with below PHP code.
/**
 * Plugin Name: Lead Generator
 */
After this little exercise, you will be able to see your plugin listed in your WordPress plugin list. Log in to your WordPress site, and click Plugins on the left navigation pane of your WordPress Admin. This page displays a listing of all the plugins that your WordPress site has. Your new WordPress plugin should now be on that list, as of the screenshot below.
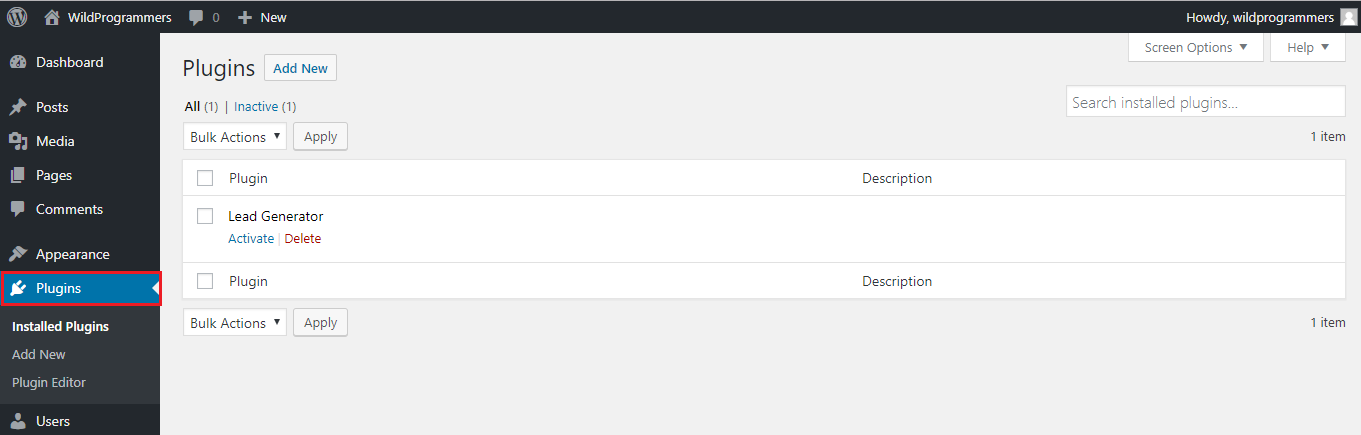
Note: If your plugin has multiple PHP files, only one of those files, in your plugin directory, should have this header comment.
Header Requirements
Even though WordPress plugin requires a single header comment i.e. Plugin Name to get identified as a WordPress plugin, there are a lot of things you can describe while creating the plugin, which provides extra information about your plugin. This includes, but not limited to, plugin description, author name, plugin version and so on. Below is the header section, which we will use in our case.
/**
 * Plugin Name: Lead Generator Plugin
 * Description: A walkthrough for most of the WordPress plugin development concepts.
 * Version:     1.0.0
 * Author:      Wild Programmers
 * Author URI:  https://www.wildprogrammers.com
 * License:     GPL v3
 * License URI: https://www.gnu.org/licenses/gpl-3.0.html
 * Text Domain: leadGenerator
 * Domain Path: languages
 *
 * @package Lead Generator Plugin
 * @category Core
 * @author Wild Programmers
 */
Feel free to play with the above configuration. Once you save this config, you can see the WordPress plugin config in action on the plugin list page. You can find the sample screenshot below.
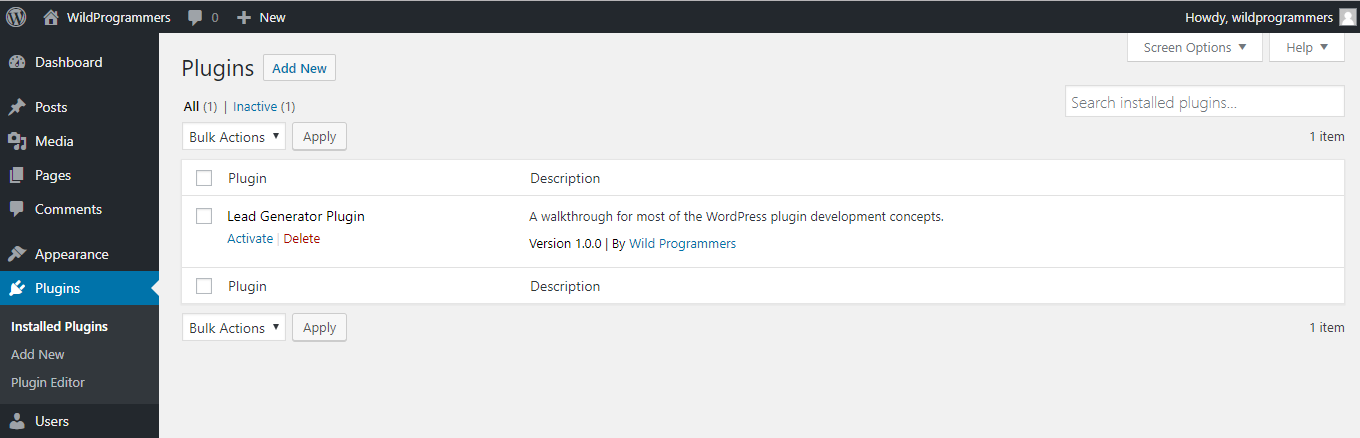
You can find the complete list of available header fields from wordpress.org
How WordPress loads plugin?
You might be thinking how does this small comment gets registered as a WordPress plugin? Or how does WordPress known whether this file represents a plugin?
The answer is simple – when WordPress loads the plugins page of the WordPress admin, it searches through all the files and folder within the plugins directory for the PHP file with WordPress plugin header comments. Hence, if you have any single PHP file within your plugin directory with appropriate header comments, it will be identified as a plugin.
PUZZLE – WordPress will search through the files in the root of the plugin folder or sub-folders. If you create a PHP file with valid WordPress plugin header comments in a sub-directory or a folder inside a sub-folder, it will not be considered as a WordPress plugin and won’t show up in WordPress plugin list.
For e.g., create a file lead-generator-2.php file inside the lead-generator folder and add below contents in it. Once done, navigate to the plugins list and you will see Plugin 2 listed.
/**
 * Plugin Name: Plugin 2
 * Description: This will be considered as a WordPress plugin
 *
 * @package Lead Generator Plugin
 * @category Core
 * @author Wild Programmers
 */
Now, create a folder called “includes” inside “lead-generator” and add below content. Once done, refresh the WordPress plugin list and you will see that this file is not considered as a separate plugin.
/**
 * Plugin Name: Plugin 3
 * Description: This will not be considered as a WordPress plugin.
 *
 * @package Lead Generator Plugin
 * @category Core
 * @author Wild Programmers
 */
WordPress Hooks
When it comes to WordPress plugin development, hooks are the key. You will soon learn that you can’t do almost anything in WordPress development without using hooks. As it is so important in WordPress plugin as well as WordPress theme development, hooks require a separate article, which explains hooks types and purpose as well as covers some side concepts.
However, while creating a WordPress plugin, you need to use some basic hooks – to tap the plugin during activation, deactivation, and uninstallation.
Activation Hook
The activation hook runs when you activate any WordPress plugin. You would use this hook to make initial plugin configuration, like saving default options or creating a table in the database. You can also add a version check in the activation hook so as you can update/add any extra configuration.
To set up an activation hook, use the register_activation_hook() function, as of below example.
register_activation_hook( __FILE__, 'activation_function' );Note: Here we are assuming that the “lgp_install” function is defined in the same file as of the “register_activation_hook”. If this is not the case, then you need to change the above implementation.
register_activation_hook() expects a parameter as a function that needs to be executed when your plugin is activated. You can refer to detailed documentation from WordPress code reference.
In the case of the Lead Generator plugin, we will save some labels which will be used for collecting project details and user information. To achieve this, copy below code in lead-generator -> lead-generator.php
<?php
/**
 * Activation Hook
 *
 * Register plugin activation hook.
 *
 * @package Lead Generator
 * @since 1.0.0
 */
register_activation_hook(__FILE__, 'lgp_install');

/**
 * Plugin Setup (On Activation)
 *
 * Does the initial setup,
 * save default values for the plugin options.
 *
 * @package Lead Generator
 * @since 1.0.0
 */
function lgp_install() {

    // Todo: Register Post type
    lgp_register_post_type();

    $options = array(
        'phone_label'		    =>	esc_html__( 'Phone Number', 'leadGenerator' ),
        'email_label'		    =>	esc_html__( 'Email Address', 'leadGenerator' ),
        'budget_label'	            =>	esc_html__( 'Budget', 'leadGenerator' ),
        'min_budget'		    =>	5000,
        'max_budget'		    =>	0,
        'date_inserted_label'	    =>	'Date Inserted',
        'time_inserted_label'       =>  'Time Inserted'
    );

    update_option('lgp_options',$options);
}
Code Explanation – When you activate any WordPress plugin, WordPress will call the “register_activation_hook” function, which in turn will call the “lgp_install” function which adds the default values.
Don’t worry if this code doesn’t make sense to you. The only thing you need to understand here is how WordPress plugin activation hook works and why we need to use it.
Deactivation Hook
The deactivation hook runs when you deactivate the plugin. This hook is used to clear any temporary data stored by your plugin. To set up a deactivation hook, use the register_deactivation_hook() function, as of below example.
register_deactivation_hook( __FILE__, 'deactivation_function' );In the case of the lead-generator plugin, we need to unregister the post type. We will cover what and how for custom post-types later. Refer to the sample deactivation hook as below.
/**
 * Deactivation Hook
 *
 * Register plugin deactivation hook.
 *
 * @package Lead Generator
 *  @since 1.0.0
 */
register_deactivation_hook(__FILE__, 'lgp_deactivation');

/**
 * Plugin Setup (On Deactivation)
 *
 * @package Lead Generator
 * @since 1.0.0
 */
function lgp_deactivation() {

    lgp_unregister_post_type();
}
Uninstall
Your plugin may be saving some custom data, according to the plugin functionality. When, due to any reason, the customer wants to stop using your plugin and delete the plugin from his WordPress installation, you must clean up all the data which your plugin stored. This is achieved using uninstall methods.
Note: Many newbies get confused about the usage of deactivation and uninstallation. Your user may deactivate your plugin for many reasons like checking your plugin’s compatibility or what is making his website slow. This is a temporary de-activation and he may activate once he is done with his task. Uninstallation is something when, due to any reason, the user decides to stop using the plugin.
Plugin uninstallation can be achieved using two ways as listed below.
1. Uninstallation hook
To set up an uninstall hook, use the register_uninstall_hook() function.
register_uninstall_hook(__FILE__, 'uninstall_function');In the case of the lead-generator plugin, you can delete all the options saved while activating the plugin as below.
/**
 * Uninstallation Hook
 *
 * Register plugin uninstallation hook.
 *
 * @package Lead Generator
 *  @since 1.0.0
 */
register_uninstall_hook(__FILE__, 'lgp_uninstallation');

/**
 * Plugin Uninstallation (On Uninstalation)
 *
 * @package Lead Generator
 * @since 1.0.0
 */
function lgp_uninstallation() {

    // Delete the option
    delete_option('lgp_options');
}
This approach allows you to create a function and place it in your main file or any other file you want. This is helpful when your plugin is relatively small and it doesn’t have a big uninstallation logic.
However, if your plugin has a very long uninstallation logic, like deleting data tables and options – you should go with the below approach.
2. uninstall.php file
This method allows you to clean up the plugin by creating an uninstall.php file inside the root folder of your plugin. In a similar way to the uninstallation hook, the uninstall.php file gets called when the user deletes the plugin.
Best Practice – If you intend to use this method, make sure to check for WP_UNINSTALL_PLUGIN constant before doing any cleanup.
In the case of the lead-generator plugin, the uninstall.php file will look something like this.
// if uninstall.php is not called by WordPress, die
if (!defined('WP_UNINSTALL_PLUGIN')) {
    die;
}

// Delete the option
delete_option('lgp_options');
As in the case of the lead-generator plugin, uninstallation is just deleting some labels and plugin is relatively small, we would like to move with the first approach. But you can definitely go with the second one in your case.
That is all for this article. In this article, we have seen how we create a WordPress plugin and register it on the WordPress plugin list, as well as we also saw the different header comments that WordPress supports.
We also had a brief look at WordPress hooks and had a detailed look at WordPress activation, deactivation, and uninstallation hook. You can find the complete code of lead-generator.php, after this article, here.
In the next article, we will understand what are WordPress hooks, why we require them, various types of hooks and will go through some most used hooks. Until then HAPPY CODING 🙂