

In this GETTING START guide, we will teach you how to setup EDD Category Discount in 3 easy steps.
You should refer to this article if
- You are planning to provide discounts in your digital store and looking for a great discount plugin.
- You have bought the EDD Category Discount plugin and looking for a guide to set it up.
Activate EDD Category Discount
- Login to your Envato account, navigate to your downloads page and download EDD Category Discount plugin.
- Login to your WordPress dashboard.
- Go to: Dashboard > Plugins > Add New > Upload
- Upload the downloaded plugin.
- Install and Activate the plugin.
Create a Discount Category
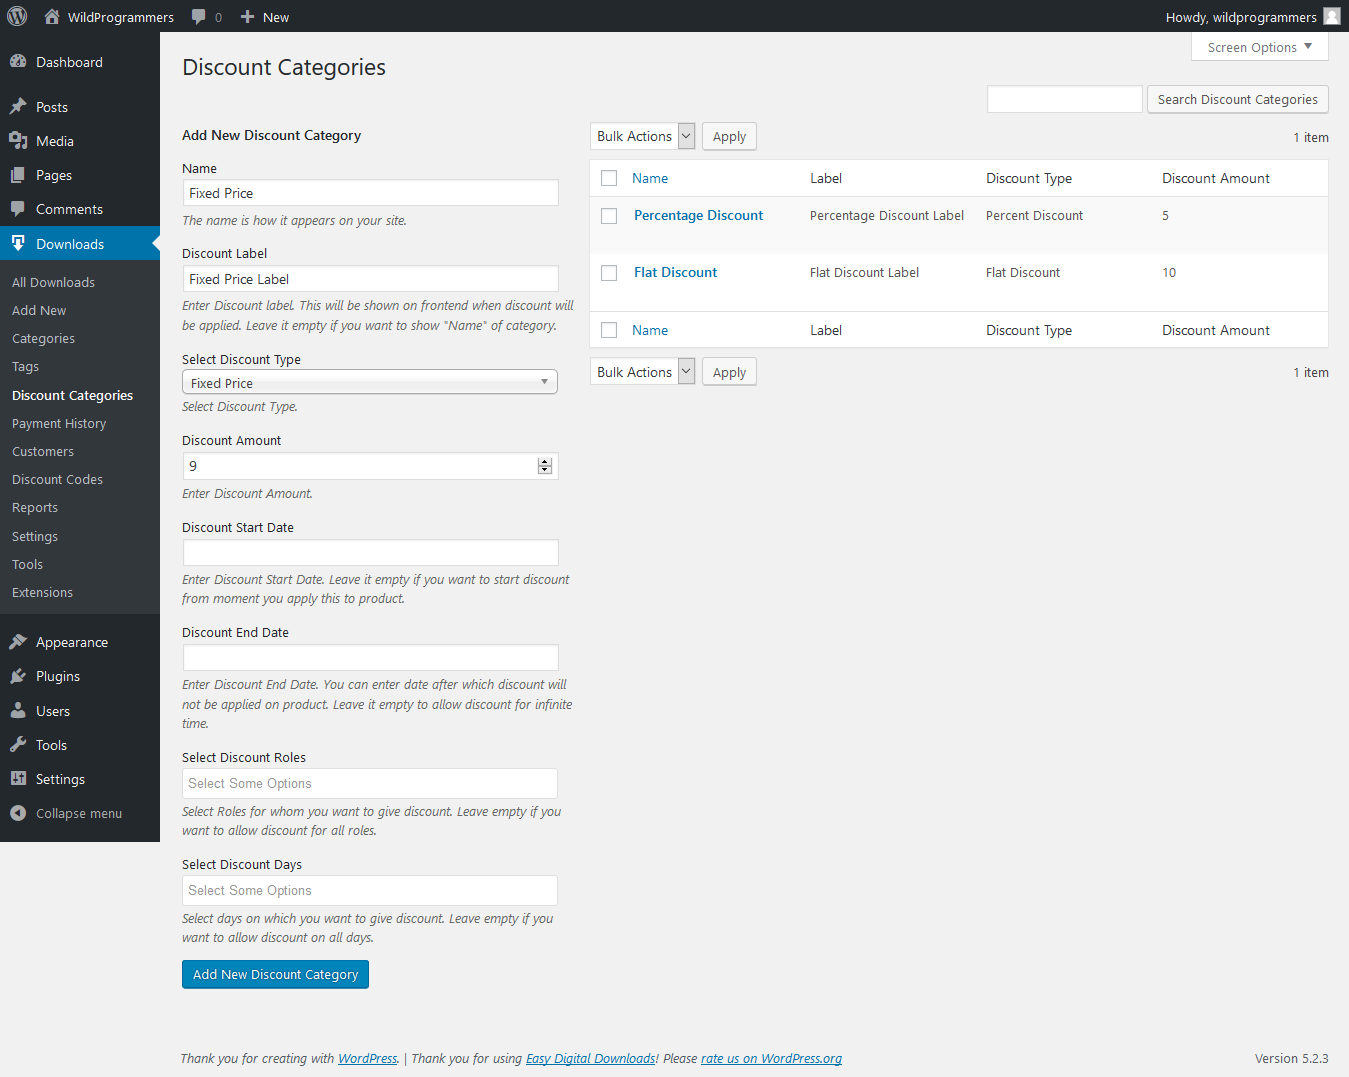
Login to your WordPress dashboard and navigate to Downloads -> Discount Categories. You will get the screen as shown below.

As shown in the above screenshot, you will be provided a number of options and you need to use them to create the discount as per your requirement. You can find the details of each option below.
- Name – The Discount Category Name is used for internal identification purposes. This is how the name appears on the meta box screen, explained a bit later.
- Label – Discount Category Label is how the discount name appears to the user when they are eligible for a discount. If left empty, the Name field will be shown by default.
- Select Discount Type – Select the discount type you want to provide to your customers. You can select from the below options.
- Flat Discount – Provides a Flat Discount on download price.
- Percent Discount – Provides a Percentage Discount of the download price.
- Fixed Price – Sets the download price to the fixed amount, irrespective of the download price.
- Discount Amount – Enter the discount amount for the discount type selected.
- Discount Start Date – Enter the discount start date. This is the date from which your customers will start getting the discount. You can use this to create discounts in the future.
- Discount End Date – Enter the discount end date. This is the date up till which your customers get the discount.
- Select Discount Roles – Select from the list of available roles to whom you want to provide the discount as part of this discount rule.
- Select Discount Days – Select the days on which you want to provide the discount. You can use them to provide discount on specific days for e.g. provide discount only on Wednesday
Refer below screenshots for sample implementations.


Create a Download and assign Discount Category
Navigate to WordPress dashboard -> Downloads -> Add New Download. You will find an EDD Category Discount meta box as shown below.
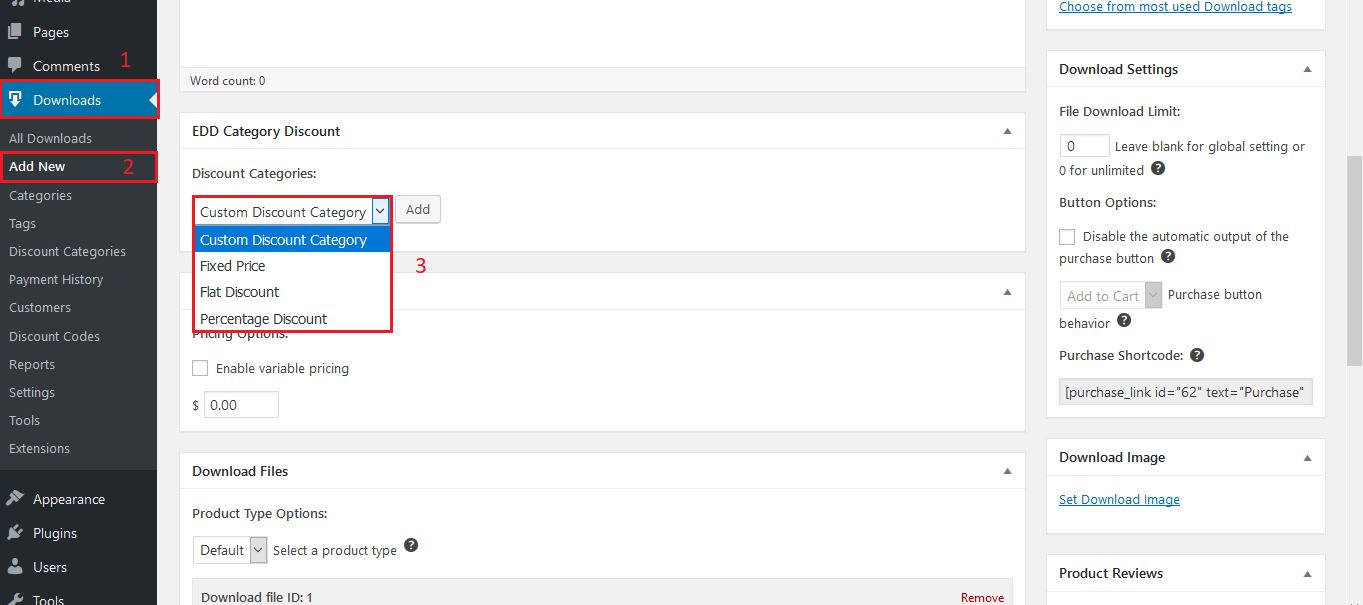
As shown in the above image, you have two options. Either choose from the available discount category or create a custom, download-specific discount category.
1. Select from available Discount Categories
As shown in the above screenshot, you can select any of the available discount categories. Selecting a pre-generated discount category will populate all the options from the category settings, as per the below screenshot.
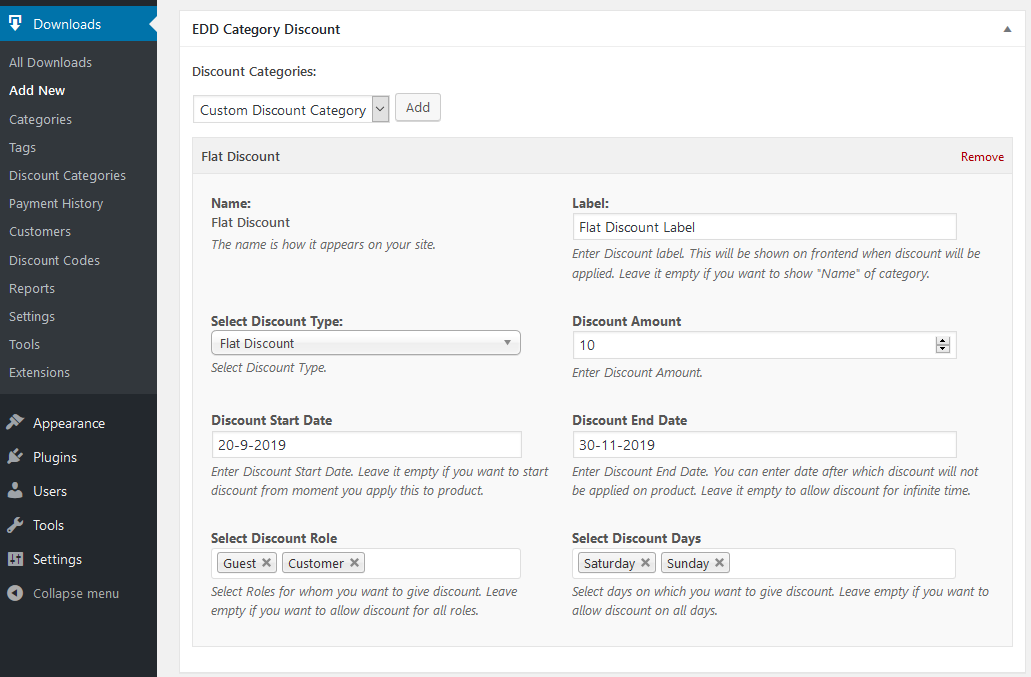
Apart from using all the category settings, EDD Category Discounts also allows you to make download specific custom changes to the category, as shown in the above screenshot.
Note: Changes made here will only be download specific. Changes here will not change any settings at the category level.
2. Custom Download-specific discount category
Even though EDD Category Discount is all about reusing the discount rule, it gives you the capability to create a download-specific discount category. This is especially helpful when you want to provide a special discount on a couple of downloads.
To create a download-specific category discount, select “Custom Discount Category” and click Add button. On click of Add button, you will see one empty discount category getting added, as below screenshot.

All the options are the same as explained in the Create a Discount Category section and needs no further explanation.
Note: Download-specific category will not create a new category in Category Discounts but will only be download specific.
This is all.
Really??? I am sure you will have the same question in mind. But yes, really this is all you need to do and you are all set to increase the sales and getting more profit by offering discounts to your customers.
What next? Now, we will walk you through the customer experience so as you know what will the customer see when he is eligible for a discount.
User Experience
Along with the ease of creating and providing discount rules, EDD Category Discount also provides a clear user-experience regarding the discount details, on all the download pages, as below.
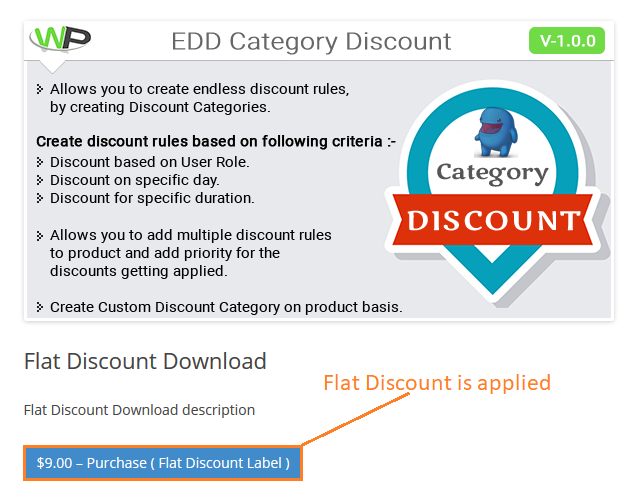
Download Page
On the download page, the plugin shows the discounted price as well as a discount label – as shown in the below screenshot.
Checkout Page
The plugin provides the discount details on the checkout page. It adds the discount details as a sub-title below the download name, as shown in the screenshot below.

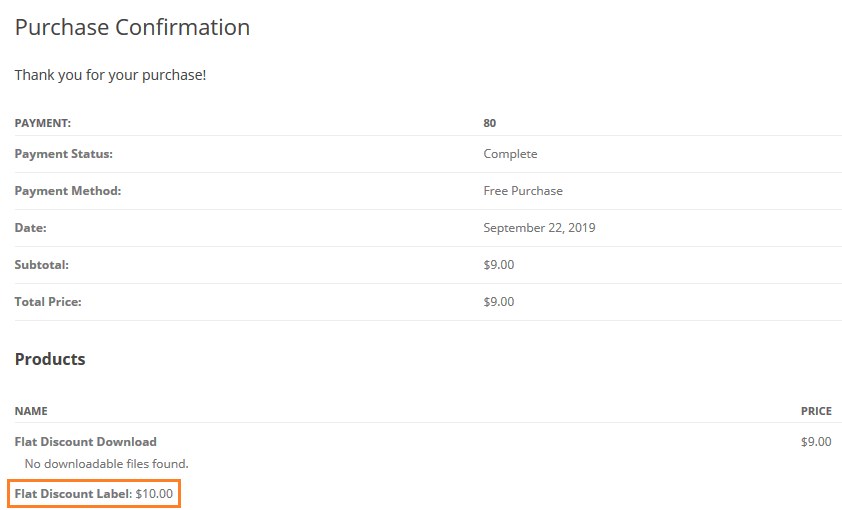
Purchase Confirmation Page
The plugin adds a new row below the download name on the purchase confirmation page, as shown in the screenshot below.
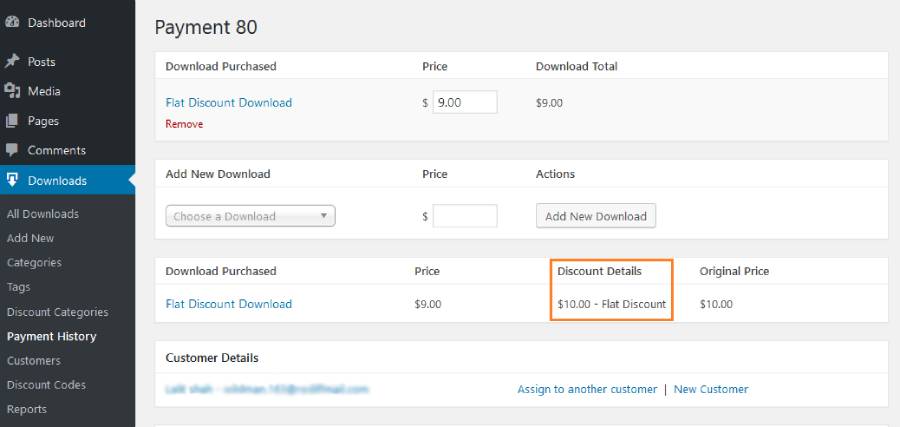
Payment History Page
The plugin adds the discount details on the payment history page too, for site admin’s future reference, as shown in the below screenshot.
So, now you have the knowledge of how to setup EDD Category Discount from scratch. If you face any issues in following this tutorial, feel free to create a support ticket contact us at contact@wildprogrammers.com. Happy Discounting!!! 🙂